

How to Remove Swirl Marks and Restore a Showroom Finish
Few things are more disheartening than stepping back after a fresh hand wash only to find your paintwork covered in a faint spiderweb haze. Those fine, circular scratches scatter reflections and break up what should be a smooth, mirror-like shine. The good news is that swirl marks are almost always fixable with the right technique. To remove swirl marks and restore a showroom finish, the basic process involves washing and decontaminating the paint, polishing with the correct compound and pad, and then sealing the corrected surface with a protective layer.
Swirl marks form when small particles such as dust, dirt, or debris are dragged across the surface during washing or drying. Over time, these micro-scratches build up in the clear coat and create that hazy, spiderweb effect, but most swirl marks sit only in the clear coat, not deep in the paint. That distinction matters enormously, because it means you can correct them without a professional respray in the vast majority of cases.
Here in Colorado, paint is under particular strain. The state’s high altitude means UV exposure is roughly 25% more intense than at sea level, which accelerates paint oxidation and degrades rubber seals and trim pieces. Add the road salt, magnesium chloride, and grit that come with Front Range winters, and your clear coat is working harder than paintwork in most other parts of the country. All the more reason to address swirl marks promptly before they deepen.
Key Takeaways
-
Swirl marks live in the clear coat: Swirl marks are microscopic scratches on a car’s clear coat that appear as circular or spiderweb-like patterns under bright light. While they do not usually penetrate deep into the paint, they can significantly reduce gloss and make your car look faded. Polish them out before they worsen.
-
Preparation is everything: Clay bar treatment is a critical preparation step before paint correction, washing alone cannot remove bonded contaminants. Skipping this step risks grinding grit into the very surface you are trying to correct.
-
Machine polishing beats hand polishing for full-panel correction: According to Carfe’s machine vs hand polishing guide, swirl removal normally requires machine polishing with the right pad and polish, hand polishing may reduce the appearance of very light marks, but will not reliably remove them across full panels.
-
Colorado’s UV intensity demands post-correction protection: In Colorado’s high-altitude environment, with its increased UV exposure, oxidation can progress faster than in other regions, so sealing corrected paint immediately is non-negotiable, not optional.
-
Ceramic coating locks in whatever lies beneath it: A ceramic coating locks in whatever is underneath it. If your paint has swirl marks, water spots, or fine scratches when the coating goes on, those flaws are now sealed under a hard layer that will not buff out easily. Always correct first, then coat.
Quick-Start Prioritisation Framework
| Swirl Severity | Best Approach | Effort Level | Expected Time to Results |
|---|---|---|---|
| Light (visible only in direct sun) | Hand polish with finishing compound | Low | 1-2 hours |
| Moderate (visible in shade) | Dual-action polisher, medium-cut pad | Medium | Half day |
| Heavy (visible in all light) | DA polisher, cutting compound + refine | High | Full day |
| Severe + oxidation | Professional paint correction | High | Book a detailer |
Start here if you are:
-
A first-timer with light swirls: Use a hand applicator and a dedicated finishing polish on one test panel first, then assess before committing to the whole car.
-
A confident DIYer with moderate swirls: Pick up a dual-action (DA) polisher. A dual-action polisher is safer for beginners than a rotary and will deliver far more consistent results than hand application.
-
Dealing with heavy swirling on a dark-coloured vehicle: Contact a professional detailer. Paint correction typically ranges from $500 to over $2,500, depending on damage severity and panel size. At that cost, getting it right the first time protects your investment.
Step 1, Wash the Paint Properly Before You Touch a Polisher
Why the wash stage matters more than most people think
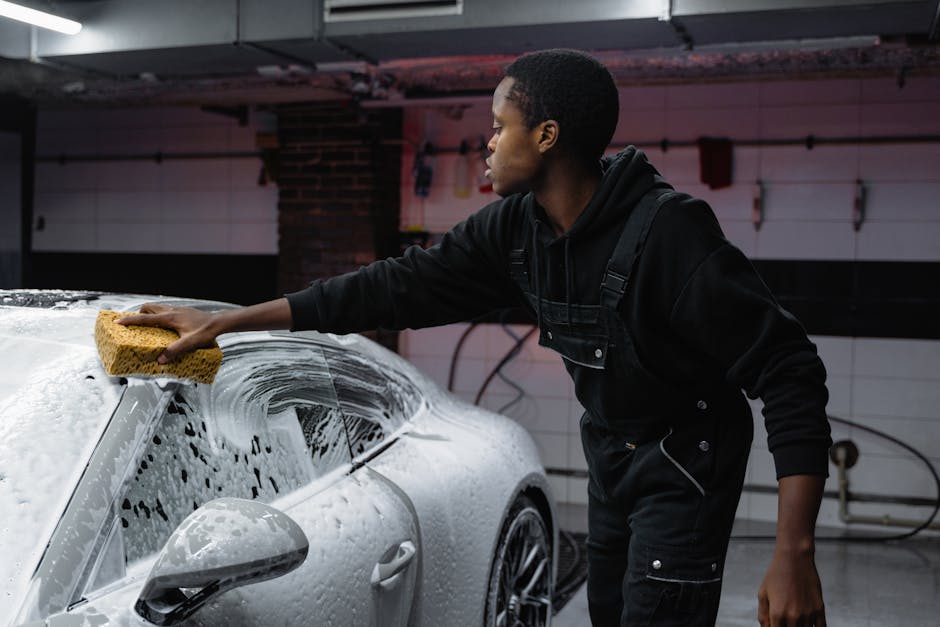
Most paint damage happens during routine care, not from driving. I have seen this countless times, someone who is meticulous about polishing but still uses a single dirty bucket and a sponge, then wonders why the swirls keep coming back. The wash creates the foundation. If you introduce fresh scratches during this stage, polishing simply chases its own tail.
Before polishing, the paint must be completely clean. Any leftover dirt, dust, or road grime will act like sandpaper and make the problem worse. Start with a thorough pre-rinse or foam cannon application to float off loose debris, then move to the two-bucket wash method.
The two-bucket method
Wash your car using the two-bucket method: one bucket for soapy water and another for rinsing your mitt. Always work from top to bottom. This keeps contamination from your previous pass from being dragged back over clean paint. According to Produxa’s swirl mark prevention guide, placing a grit guard at the bottom of your wash bucket traps dirt and debris, preventing them from being transferred back onto the car’s surface. Use a pH-balanced shampoo and a quality microfiber wash mitt, and move in straight lines, never circles.
Pro Tip: After washing, run your hand over the paint inside a clean plastic sandwich bag. If it feels rough or gritty, the paint still has bonded contamination. That means a clay bar step is essential before you even think about polishing.
Drying safely
Gentle drying with clean microfiber towels or air dryers prevents additional scratches and maintains paint integrity. A forced-air blower is ideal because it removes water without any surface contact at all. If you use a towel, make sure it is freshly laundered and completely free of debris.
Step 2, Decontaminate with a Clay Bar
What a clay bar actually does
The goal of any clay bar treatment is to remove any number of contaminants that riddle the paintwork of any car that sees the road, including brake dust, rail dust, tar, tree sap, iron fallout, overspray, and more. In my experience, this step is the most skipped and the most consequential. Washing removes surface dirt, but it cannot remove particles that have bonded into the clear coat.
Paint correction involves polishing the clear coat to remove defects such as swirl marks, oxidation, water spots, and light scratches. If contamination remains on the surface, polishing pads can become clogged, polishing efficiency can decrease, and additional paint defects may be introduced during the correction process. In short, claying before polishing means your polishing compound is cutting swirl marks, not grinding grit into your paint.
How to clay bar correctly
According to Chemical Guys’ clay bar guide, the most common causes of clay bar damage are skipping the pre-wash, using too little clay lubricant, and continuing with a contaminated bar. Mist a generous amount of clay lubricant onto one section at a time, glide the clay bar back and forth in straight lines with very light pressure, and fold it to a clean face frequently. Run your hand over the paint after claying; it should feel as smooth as glass.
Pro Tip: For Colorado vehicles that spend winters on roads treated with magnesium chloride, use a dedicated iron remover spray before the clay bar step. The chemical reaction dissolves embedded ferrous particles that the clay bar alone cannot always lift, leaving a genuinely clean surface for the polisher.
Step 3, Polish Out the Swirl Marks
Choosing between hand polishing and machine polishing
This is where most DIY efforts either succeed or stall. For light swirl marks, hand polishing with a dedicated swirl remover is an excellent first step. Use a soft microfiber or foam applicator pad and apply gentle, even pressure in straight lines instead of circles. That works well for a single panel with fine marks.
For anything heavier, or when you need consistent results across an entire vehicle, machine polishing is the right call. Hand polishing can be effective especially on small areas with fine abrasives, and it is possible to remove light swirling in this way. But machine polishing will usually be the quickest, most consistent and most effective method.
Selecting your compound and pad
The general rule is to start with the least aggressive option that still gets the job done. Compound is the more aggressive machine paint correction step that is used when you have deeper swirl marks and scratches that polish has difficulty removing. Compound combined with a more aggressive cutting pad can make significant damage nearly disappear, but since it is more aggressive it will usually leave a haze that then requires stepping down to a polish and softer pad to bring back the original colour and depth.
-
Light swirls: finishing polish + soft foam pad
-
Moderate swirls: medium-cut polish + medium foam or microfiber pad
-
Heavy swirls: cutting compound + cutting pad, followed by a refining polish
Using a dual-action polisher safely
Work in small sections with slow overlapping passes. Wipe and inspect after each pass. Keep the machine moving at all times, holding it stationary generates excess heat and risks burning through the clear coat. Too much pressure or heat can burn the clear coat, so let the pad and compound do the work rather than leaning into the machine.
I’ve found that working under a dedicated LED inspection light makes an enormous difference here. It reveals swirls that overhead fluorescents miss and tells you when a section is genuinely corrected rather than just looking better.
This walkthrough covers the polishing techniques that actually remove swirl marks effectively, including the common errors that prevent real correction.
Step 4, Protect the Corrected Paint
Why you must seal immediately after polishing
Applying sealant immediately after correction creates a sacrificial barrier that prevents new swirl marks from forming on bare paint. Polishing removes a thin layer of clear coat and leaves the surface exposed. Leaving corrected paint unprotected, even for a day or two, risks contamination bonding to the bare surface. In Colorado’s dry, dusty conditions, this happens faster than you might expect.
Wax vs sealant vs ceramic coating
Understanding what each product does will save you money and frustration.
Wax:
Wax does not remove swirl marks repair scratches, or restore paint that is already oxidized or damaged. It covers and protects the finish temporarily, but it cannot substitute for paint correction when the surface needs restorative work. According to Rodeo Express Car Wash’s comparison guide, traditional wax generally lasts several weeks to a few months before needing another application. Use it as a short-term protective layer on a budget, knowing you will reapply it regularly.
Paint sealant:
A synthetic sealant typically outlasts carnauba wax by several months and bonds more consistently to the clear coat. It makes an excellent interim solution after polishing while you save for a ceramic coating.
Ceramic coating:
Ceramic coating is a liquid polymer that chemically bonds with your vehicle’s paint to create a protective layer. It enhances gloss, repels water and dirt, and protects against UV rays, chemical stains, and environmental contaminants. For Colorado drivers dealing with intense UV and seasonal road chemicals, ceramic coating is the most durable option available. However, and this is critical, for the best results, it is recommended to correct any existing swirl marks before applying a ceramic coating. Coating over uncorrected paint seals the defects permanently.

Common Mistakes That Undo Your Work
Using automatic brush car washes after correction
Automated car washes can cause swirl marks. The rotating brushes often hold grit and grime as they wash many vehicles throughout the day and may leave micro-scratches all over your car. After investing time in correction, a single tunnel brush wash can re-swirl the entire vehicle. Switch to hand washing or touchless washing only.
Applying pressure in circular motions during washing
Use a high-quality car shampoo and a microfiber wash mitt, working in straight lines or a top-to-bottom pattern to minimise the risk of scratching. Avoid circular motions, as they can create or worsen swirl marks. The circular motion that feels thorough is precisely what creates the spiderweb pattern under sunlight.
Drying with a dirty or rough towel
Even the best microfiber towel will cause scratches if it is dirty. Wash your drying towels separately from other laundry, without fabric softener (which clogs the microfibre fibres), and inspect them before every use. If a towel has picked up any grit, retire it from paint duty.
Pro Tip: If your vehicle sits outside in Denver or along the Front Range through winter months, rinse the paint thoroughly after every drive on treated roads. Magnesium chloride is sticky and does not rinse off with a single pass, use adequate water pressure to flush it from panel gaps and lower bodywork where it accumulates.
Frequently Asked Questions
How do I know whether my swirl marks are light or severe?
Light swirls are visible only in direct light and disappear when you run a fingernail across them (the nail does not catch). If the nail catches, the scratch is deeper than the clear coat surface and may require a more aggressive compound or professional assessment. Use a high-intensity LED swirl-finder light, hold the light at various angles and distances from the paint, this will reveal the true extent of the swirl marks, holograms, and any deeper scratches.
Can I remove swirl marks entirely by hand without a machine polisher?
Hand polishing may reduce the appearance of very light marks, but it will not reliably remove swirls across full panels. Swirl removal normally requires machine polishing with the right pad and polish. For a small area or a single panel with very fine marks, hand application is a reasonable starting point. For a full vehicle correction, a dual-action polisher is the practical choice.
Will swirl marks come back after polishing?
Swirl marks do not come back on their own once they are polished out. New swirls only appear from improper washing, drying, or automatic car washes. The key to a lasting result is changing the habits that created them in the first place, the two-bucket method, clean microfibre tools, and staying away from brush car washes.
Does ceramic coating hide swirl marks?
The short answer is no, not really. Ceramic coatings are designed to protect your car’s paint, not to correct existing imperfections. In fact, the high-gloss nature of ceramic coating can make swirl marks more visible rather than less. Always polish first, then coat. This is the sequence that FB Mobile Auto Detailing follows on every paint correction service, correction before protection, never the reverse.
How often should I clay bar and polish my vehicle in Colorado?
According to Chemical Guys’ clay bar guide, once or twice a year is right for most drivers, with high-contamination environments warranting quarterly decontamination. For Colorado vehicles exposed to road salt and industrial fallout from autumn through spring, a clay bar treatment at the start and end of winter is a sensible rhythm. Full machine polishing is typically needed every one to three years depending on how well you protect and maintain the paint between sessions.
When to Call in a Professional
Some situations genuinely call for professional hands. If the scratch catches your fingernail, extends into the colour coat, or covers large panels uniformly, a DIY approach risks removing more clear coat than is wise. Get it wrong, and you can permanently haze or thin your clear coat, making the problem far worse.
The team at FB Mobile Auto Detailing provides mobile detailing in Denver and across the Front Range, bringing professional-grade paint correction equipment directly to your driveway. Mobile auto detailing means no dropping your car off, no waiting, just clean, corrected, protected paint on your schedule. If you have been putting off addressing heavy swirling because the process feels overwhelming, a professional assessment is the fastest way to understand what your paint actually needs.
Sources
-
How to Remove Swirl Marks from Your Car’s Clear Coat, Stoner Car Care. https://stonercarcare.com/blogs/exterior-tips/how-to-remove-swirl-marks-from-your-car-s-clear-coat-and-keep-them-from-coming-back
-
How To Remove Swirl Marks On Car Paint Permanently, Chemical Guys. https://www.chemicalguys.com/blogs/exterior-how-tos/swirl-marks-on-car
-
How To Clay Bar Your Car Properly, Chemical Guys. https://www.chemicalguys.com/blogs/exterior-how-tos/how-to-clay-your-car
-
10 Most Effective Ways of Removing Swirl Marks from Car Paint, Right Car Detailing. https://rightcardetailing.com/way-of-removing-swirl-marks-from-car-paint/
-
How to Remove Swirl Marks from Car Paint (Guide), Mobile Detailing Expert. https://www.mobiledetailingexpert.com/blog/how-to-remove-swirl-marks-from-car-paint
-
Machine vs Hand Polishing Explained, Carfe. https://carfe.co.nz/knowledge/machine-polishing-vs-hand-polishing
-
How to Remove Swirl Marks from Car Paint with Polishing and Compounds, AutoDetailPedia. https://autodetailpedia.com/remove-swirl-marks-car-paint/
-
Hand Polishing vs Machine Polishing, Adam’s Polishes. https://adamspolishes.com/pages/hand-polishing-vs-machine-polishing
-
Paint Correction vs Ceramic Coating vs Wax, Rodeo Express Car Wash. https://rodeoexpresscarwash.com/blog/paint-correction-vs-ceramic-coating-vs-wax
-
Ceramic Coating vs Wax: Which Protection Lasts Longer?, AZ Detailing / Pit Stop Auto Detailing. https://www.azdetailing.com/blog/ceramic-coating-vs-wax
-
Will Ceramic Coating Hide Scratches and Swirl Marks?, Top 5 Most Asked Questions, Wax is Dead. The short answer is no, not
-
Colorado Weather and Car Wash Protection Tips, Rocket Express Car Wash. https://www.rocketexpresscarwash.com/colorado-weather-car-wash-protection-tips/
-
12 Car Paint Damage Types That Destroy Resale Value, Springs Detailing. https://springsdetailing.com/car-paint-damage-types/
-
Why PPF? Colorado Springs Automotive Protection, WFXG / Local Press Release. Paint correction typically ranges
-
Clay Bar Before Paint Correction, BrilliaTech. https://www.brilliatech.com/blogs/clay-bar-before-paint-correction/
-
How to Remove Swirl Marks from Car Paint, Big’s Mobile Detailing. Automated car washes can cause
-
How to Properly Decontaminate a Vehicle Before Detailing, Shine Works Supply. https://shineworkssupply.com/blogs/news/how-to-properly-decontaminate-a-vehicle-before-detailing
-
Clay Bar Treatment: Complete DIY Guide, CB Detailing MA. https://www.cbdetailingma.com/blog/clay-bar-treatment


