
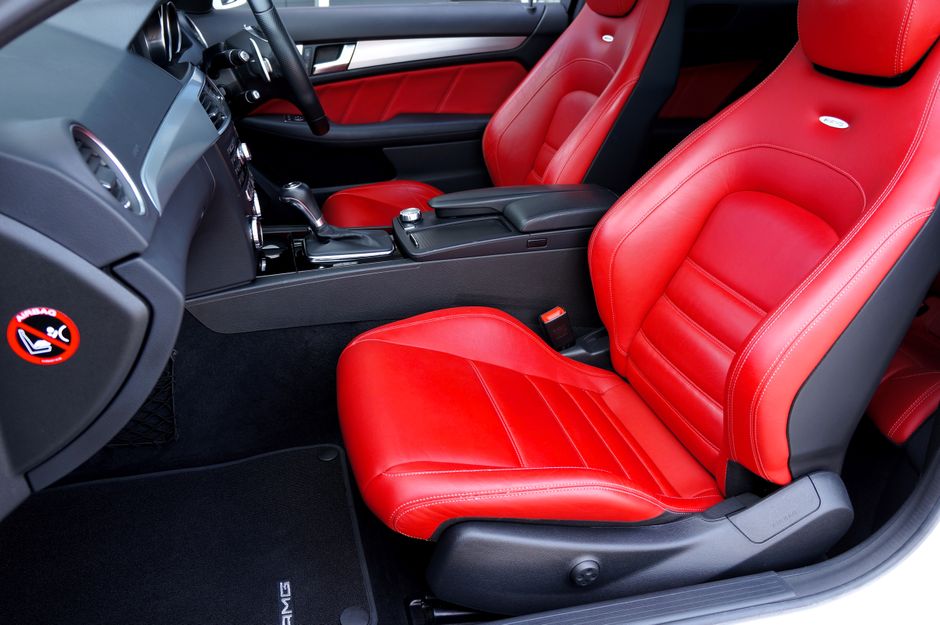
How to Clean Car Seats and Keep Them Looking Brand New
To clean your car seats properly, the process involves three core stages: vacuuming loose debris, applying the right cleaner for your seat material, and conditioning or protecting the surface afterwards. Getting the sequence right matters far more than scrubbing hard, and in a state like Colorado, where intense UV, low humidity, and wild temperature swings put extra stress on interiors, skipping steps costs you money in the long run.
I’ve spent time working alongside professional detailers and learning what truly separates seats that age well from those that crack, fade, or smell musty by year three. The difference is almost always consistency and material knowledge, not expensive products.

Key Takeaways
-
Vacuum before you wet-clean: Thoroughly vacuuming car seats as the first cleaning step makes the rest of the job easier, removing dust, debris, and pet hair rather than pushing it deeper into the seat padding. Therefore, always vacuum before applying any liquid.
-
Match your cleaner to your material: Consumer Reports recommends that drivers use automotive-specific cleaners rather than household products, because household products are not formulated for car finishes and can cause permanent damage. Using the wrong product is the single most avoidable mistake.
-
Colorado’s climate demands more frequent conditioning: Colorado’s high altitude means more intense UV exposure, which accelerates fading and drying. The low humidity does not help either, leather that might last fifteen years in a humid climate can start showing wear in five or six years here along the Front Range if it is not properly maintained. Therefore, condition leather every eight to twelve weeks if you park outdoors regularly.
-
Dirty seats hurt your resale value: A full interior detail might cost between $150 and $300 depending on the vehicle’s size and condition, yet the increase in resale value could easily be $500 to $1,000 or more. In many cases, detailing pays for itself several times over. That arithmetic makes regular seat care one of the best investments you can make.
-
Bacteria levels in car seats are higher than most people expect: A study by researchers at Aston University found that the inside of cars has significantly higher levels of germs than the average toilet, with the results revealing that motorists should be cleaning their car interiors more frequently.
Quick-Start Prioritisation Framework
| Seat Material | Best Approach | Effort Level | Time to Results |
|---|---|---|---|
| Fabric/Cloth | Vacuum, upholstery cleaner, soft brush, blot dry | Medium | 1-2 hours |
| Leather | Vacuum, pH-balanced cleaner, microfibre, conditioner | Medium | 1-1.5 hours |
| Vinyl | Vacuum, mild soap solution, wipe, UV protectant | Low | 30-45 minutes |
| Heavily stained (any) | Pre-treat, enzyme cleaner, extract, repeat | High | 2-3 hours or professional service |
Start here if you are:
-
A daily commuter or family driver: Begin with fabric seat cleaning and a dedicated vacuum session, your seats accumulate grime fastest.
-
Driving a leather-interior vehicle in Colorado: Prioritise the conditioning step. UV damage at altitude is the fastest way to destroy leather seats.
-
Preparing to sell or trade in: Book a professional interior detail from a service like FB Mobile Auto Detailing, the return on investment is hard to match.
Step 1, Gather Your Tools and Identify Your Seat Material
Before you touch a drop of cleaner, spend two minutes identifying what you are working with. Properly maintaining your car’s upholstery requires understanding the best way to clean car seats based on their material. Each type, leather, fabric, vinyl, or suede, requires specific care, and neglecting regular maintenance can lead to accumulated dirt, bacteria, and even permanent damage.
How to Identify Your Seat Material
Check your owner’s manual first. If that is not handy, run your fingertip across the surface. Leather and vinyl feel smooth and slightly waxy; fabric feels woven and slightly rough. Leather typically has natural grain variations and may be perforated. Vinyl looks nearly identical to leather but lacks those subtle grain patterns and is usually found in trucks or older base-trim vehicles.
What You Will Need
The tool list is the same whether you tackle fabric, leather, or vinyl, only the specific cleaning products change.
-
Vacuum with crevice and upholstery attachments
-
Soft-bristle brush (medium stiffness for fabric, soft for leather and vinyl)
-
Microfibre cloths (white or very light coloured only, avoid dyed cloths that transfer colour)
-
Material-appropriate cleaner (upholstery foam for fabric; pH-balanced leather cleaner for leather; mild soap solution for vinyl)
-
Leather conditioner (for leather and leatherette seats only)
-
Spray bottle with clean water for rinsing
Pro Tip: Before applying any product to the full seat, test it on a small, hidden patch, such as beneath the seat or inside a seam. Before applying cleaner to the entire seat, test it on a small, inconspicuous area to ensure it does not cause discoloration or damage. If there is any damage or colour change, find a different product to use instead.
Step 2, Vacuum Thoroughly (Never Skip This)
In my experience, this is the step most people rush, and it is the one that determines how well everything else works. Start with a full vacuum of the seat surface, crevices, and seat back. Use the crevice tool along the seam where the seat cushion meets the back, this is where crumbs, pet hair, and debris accumulate most.
Vacuuming Fabric Seats
Work from the top of the seat back downward so debris falls to areas you have not cleaned yet. Pay particular attention to the seams, that narrow channel between the cushion and the back panel holds a surprising amount of grit that acts like sandpaper every time you shift position. If you have pets, use a lint roller to remove as much pet hair as you can, then vacuum the upholstery thoroughly.
Vacuuming Leather and Vinyl Seats
Use a soft brush attachment rather than a hard plastic nozzle directly on the surface. Use a vacuum cleaner with a soft brush attachment to gently remove loose dirt, crumbs, and other debris from the seats. Grit left on leather during wet cleaning scratches the surface, sand and debris settle into the seams and creases of seats, and every time you shift your weight they act like tiny pieces of sandpaper. Small scratches become bigger scratches, and bigger scratches become cracks.
Step 3, How to Clean Fabric Car Seats
Pre-Treating Stains
Spray upholstery cleaner directly onto stains and let it sit for 3 to 5 minutes. Do not rub yet, let the product penetrate the fibres first. For stubborn stains, a small amount of diluted dish soap on a soft brush works as a starter treatment.
For food and drink stains specifically, enzyme-based cleaners break down organic compounds more effectively than general-purpose products. Apply the cleaner generously to the stained area, let it sit for 10 to 15 minutes, then extract thoroughly. Fresh spills clean far more easily than set-in stains. Therefore, treat spills within the first few minutes whenever possible.
Scrubbing and Drying
Use a soft-bristle brush in small circular motions. Work in small sections rather than soaking the entire seat. This is critical: the most common mistake when cleaning fabric seats is applying too much liquid. Over-wetting drives contamination deeper into the padding rather than lifting it out and creates a damp environment that encourages mould and mildew growth. Apply cleaning products in controlled amounts and blot thoroughly.
Once you have scrubbed each section, use a microfibre towel to absorb excess moisture, as lingering dampness causes a musty odour and promotes the growth of mould and mildew. Leave doors or windows open for at least 30 minutes to allow seats to dry fully.
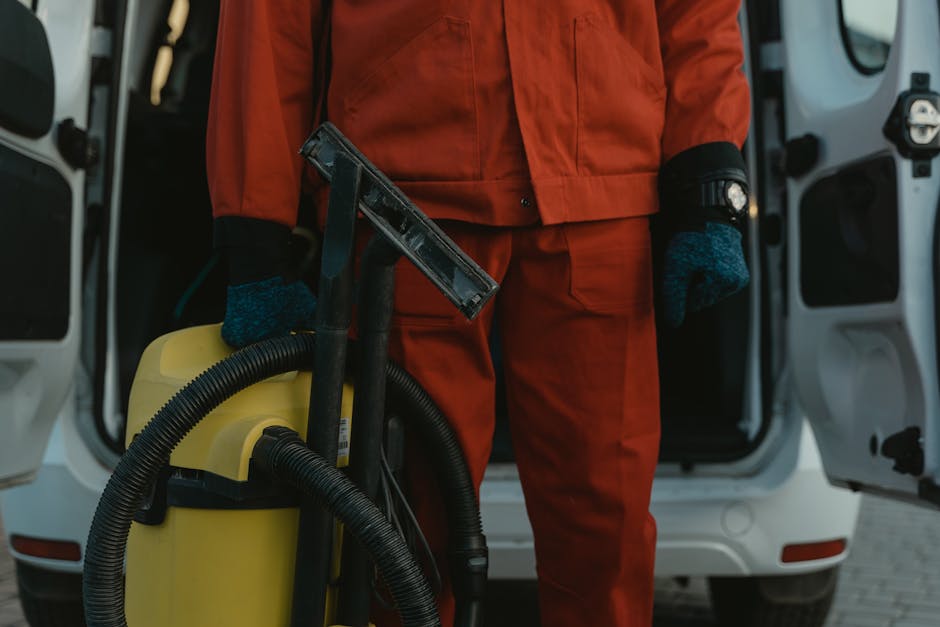
Pro Tip: If you have a wet/dry shop vacuum, use it to extract moisture from fabric seats after cleaning. It dramatically shortens drying time and pulls dissolved soil out of the padding rather than leaving it to re-deposit on the surface as the water evaporates.
This walkthrough demonstrates the full process of cleaning heavily soiled leather seats, which is useful if you are dealing with stubborn stains or built-up grime.
Step 4, How to Clean Leather Car Seats
Cleaning
Spray the cleaner onto a microfibre cloth or directly onto the leather seat if the instructions indicate it is safe to do so. Avoid soaking the leather, as too much moisture can damage it. Then Use a vacuum cleaner with a soft scrub the leather in a circular motion to lift dirt and grime, and wipe away the loosened dirt with a clean microfibre cloth.
Rinse off any residue with a lightly damp cloth. Use a vacuum cleaner with a soft on the leather, as residue can cause drying or cracking over time.
Conditioning, the Step That Actually Protects Your Investment
Cleaning alone is not enough. Conditioning is essential to replenish the natural oils that keep leather supple, hydrated, and resistant to cracking and fading.
How often should you condition? Most car experts recommend conditioning leather seats every 3 to 6 months, though this can vary. In hotter, sunnier climates the sun and heat can dry out leather more quickly, meaning you might need to condition your seats more frequently. For Colorado drivers who park outdoors, if you are parking outside regularly in areas like Aurora, Centennial, or downtown Denver where seats get more UV exposure, conditioning every eight weeks is a good target.
Conditioning leather is like using lotion on dry skin; it keeps the material moisturised and protected. Without regular conditioning, leather can lose its softness, crack, and even fade in colour. Therefore, if your leather feels stiff or looks dull, condition it now, not next month.
What Products to Avoid on Leather
Use a vacuum cleaner with a soft ammonia, or bleach on leather seats, as these can cause irreversible damage. Steer clear of conditioners containing petroleum distillates, waxes, or silicones, as these do damage over time.
Step 5, How to Clean Vinyl Car Seats
Vinyl is the most forgiving material of the three. Vinyl seats require less maintenance than real leather but still benefit from regular cleaning. The material resists stains better and dries faster than fabric alternatives.
Vinyl Cleaning Method
Mix mild soap with warm water, apply to a microfibre cloth, and wipe down the seats. For tougher marks, a soft brush and a slightly more concentrated soap solution works well. Then rinse with a clean damp cloth and dry thoroughly.
Perform a deep cleaning of your vinyl seats every one to two months to remove embedded dirt and restore their appearance. Regular cleaning keeps the material looking its best and extends its lifespan by preventing buildup that can degrade the surface over time.
What to avoid on vinyl: avoid products containing bleach ammonia, or acetone, as these can strip the protective coating on vinyl and cause discoloration, cracks, or permanent damage. Stick to mild soap or vinyl-specific cleaners designed to preserve the material’s integrity.
Finish with a UV protectant spray, especially in Colorado. For the interior, use products designed for vinyl, leather, or plastic to keep your seats and trim from cracking or fading under the sun’s rays.
Common Mistakes That Ruin Car Seats
I have seen these errors cause more damage than the original dirt, and most of them are easy to avoid once you know about them.
Using the Wrong Products
Avoid bleach, hydrogen peroxide and ammonia-based cleaners, which can damage your car’s upholstery and protective coatings. Many people grab an all-purpose household spray from under the sink, not realising it was formulated for kitchen worktops rather than automotive upholstery.
Over-Wetting Fabric Seats
The most common mistake is soaking fabric seats with too much liquid, which leads to mould growing underneath the foam. Damp is the goal, never wet. If water drips from the seat when you press it, you have used too much.
Conditioning Dirty Leather
Conditioning without cleaning first is a mistake worth emphasising. Conditioning dirty leather just locks in the grime and prevents the product from absorbing properly. Always clean before you condition, no exceptions.
Rubbing Stains Instead of Blotting
Blot liquid immediately with a clean cloth. Do not rub, which spreads contamination. Follow up with proper cleaning as soon as possible.
Pro Tip: When a stain happens on the road, blot it immediately with a clean cloth or even a paper serviette. Removing 80% of a fresh spill at the scene is far easier than fighting a set-in stain at home later.

Skipping UV Protection
This one is particularly relevant for Colorado. Over time, UV rays, heat, and humidity can lead to cracked leather, faded upholstery, and brittle plastic surfaces, making your car look older than it is. A windshield sunshade when parked, combined with a UV-protectant conditioner, makes a measurable difference. When parked in direct sunlight, a sunshade can lower interior temperatures by up to 30 degrees Fahrenheit. That directly reduces the rate at which your seats dry out and fade.
When to Call in a Professional
Some situations are beyond what a microfibre cloth and a bottle of cleaner can fix. Professional car seat cleaning services deliver deeper results with commercial equipment and expertise, especially for stubborn stains, odours, or delicate materials.
If you are dealing with pet urine that has soaked into the foam, persistent smoke odours, mould growth inside the padding, or perforated leather with deep-set grime, a professional mobile detailer is the more cost-effective option. FB Mobile Auto Detailing comes to your location in the Denver area, which means no driving across town and no sitting in a waiting room, the detail happens while you get on with your day.
Dealerships and private buyers alike assess the condition of a vehicle’s interior before making an offer. A well-maintained cabin free from stains, odours, and excessive wear can significantly boost your vehicle’s resale value. Conversely, a neglected interior with ripped upholstery, cracked dashboards, or unpleasant odours can lead to lower trade-in appraisals and reduced buyer interest.
Frequently Asked Questions
How often should I clean my car seats?
Use a vacuum cleaner with a soft three to six months to prevent dirt buildup and keep them looking fresh. Fabric seats in daily-use vehicles benefit from a full clean every one to two months, with vacuuming weekly. If you have children, pets, or frequently eat in the car, clean more often. Vacuum seats every one to two weeks to remove dust, crumbs, and pet hair. Regular vacuuming keeps seats looking neat and extends their life.
Can I use household cleaners on my car seats?
You should avoid most household cleaners. Using bleach, ammonia, glass cleaner, all-purpose sprays, or heavy degreasers will discolour, bleach, dry out, crack, or weaken leather and vinyl finishes. White vinegar diluted with water is an acceptable option for mild fabric stains, but dedicated automotive upholstery cleaners are always safer and more effective.
How do I get rid of a musty smell in my car seats?
Musty smells almost always come from moisture trapped in the foam padding beneath the fabric. Start by vacuuming thoroughly, then use an enzyme-based cleaner applied sparingly. Dry the seats completely with the doors open and a fan directed at the interior if possible. Lingering dampness causes musty odour and promotes the growth of mould and mildew. For persistent odours, a professional extraction service reaches moisture that surface cleaning cannot.
Do leather seats really need conditioning, or is it optional?
Leather car seats really do need conditioning. Conditioning helps prevent drying, cracking, and premature wear. In Colorado specifically, skipping conditioning means the leather dries out from UV exposure and low humidity at altitude far faster than it would in more humid climates. Think of it as the same logic as moisturising dry skin, neglect it long enough and the damage becomes visible and expensive to reverse.
What is the best way to handle pet hair on fabric seats?
Pet hair embeds deeply in fabric and resists regular vacuuming. Before vacuuming, run a rubber glove, a damp rubber brush, or a dedicated pet hair removal tool across the surface. The friction pulls the embedded fur to the surface where the vacuum can collect it. A lint roller is useful for the first pass, but the rubber method works better for deeply embedded hair.
Final Thoughts
Keeping your car seats clean is genuinely one of the most straightforward things you can do to protect your vehicle’s value, your health, and your daily comfort. The tools are affordable, the process is learnable in an afternoon, and the payoff is seats that look good for years rather than months.
The key is doing it consistently, a light vacuum once a week and a proper clean every one to two months is far more effective than one heroic deep-clean session every year. For Colorado drivers especially, that regular conditioning step for leather is non-negotiable given the altitude UV and dry air.
When the job outgrows what you can reasonably do at home, FB Mobile Auto Detailing brings professional-grade equipment and expertise directly to your driveway across the Denver area, no drop-off required.
Sources
-
How to Clean Your Car’s Interior, Consumer Reports. Guidance on automotive-safe cleaning products and interior care. https://www.consumerreports.org/cars/car-maintenance/how-to-clean-your-cars-interior-a8146415264/
-
How to Clean Leather Car Seats, AutoZone. Step-by-step leather seat cleaning and conditioning guide. Use a vacuum cleaner with a soft
-
How to Clean Car Seats: Fabric, Leather & Vinyl Guide, Dennis Auto Details. Comprehensive material-specific guide with professional insights. https://dennisautodetails.com/blog/interior-detailing/how-to-clean-car-seats-complete-guide/
-
Study Reveals the Inside of Your Car Is Dirtier Than the Average Toilet, Aston University. Research on bacterial contamination levels inside vehicles. https://www.aston.ac.uk/latest-news/study-reveals-inside-your-car-dirtier-average-toilet
-
Tips for Cleaning Your Car Seats Like a Pro, Family Handyman. Expert advice on professional car seat cleaning techniques. https://www.familyhandyman.com/article/car-seat-cleaning-tips/
-
Leather Seat Care: Conditioning and Treatment for Longevity, Steve’s Detailing. Colorado-specific leather care advice for high-altitude UV exposure. https://www.stevesdetailing.net/leather-seat-care-conditioning-and-treatment-for-longevity/
-
How Often Should I Condition Leather Seats?, Dr. Beasley’s. Frequency recommendations for leather conditioning based on usage. https://www.drbeasleys.com/blog/2012/11/26/how-often-should-you-condition-leather-seats
-
How Interior Detailing Increases Your Car’s Resale Value, AutoSpa360. Analysis of detailing return on investment for vehicle resale. https://autospa360.com/how-interior-detailing-increases-your-cars-resale-value/
-
Tips to Clean and Maintain Vinyl Vehicle Seats, The Seat Shop. Material-specific vinyl seat cleaning guide. https://www.theseatshop.com/blogs/tss-blog/how-to-clean-vinyl-seats
-
How to Clean Cloth and Fabric Car Seats, Chemical Guys. Fabric seat cleaning techniques and common mistakes. https://www.chemicalguys.com/blogs/interior-how-tos/how-to-clean-car-carpets-upholstery
-
How to Protect Your Car from Colorado Weather Year Round, Turbo Tide Car Wash. Season-by-season Colorado vehicle protection guide. https://turbotidecarwash.com/how-to-protect-your-car-from-colorado-weather-year-round/
-
How to Protect Your Car’s Interior from Sun Damage, Malibu Car Wash. UV protection strategies for car interiors. https://malibucarwashes.com/blogs/malibu-car-wash-and-detail/protect-car-interior-sun-damage
-
Prioritize Vehicle Interior Care to Increase Resale Value, Strong’s Auto Care. How interior condition affects trade-in appraisals. https://www.strongsautocare.com/blog-details?objId=1276
-
How to Clean Car Seats, Fabric, Leather & Every Stain Type, AutoIXPro. Material-specific cleaning methods and common errors. https://autoixpro.com/how-to-clean-car-seats/


