
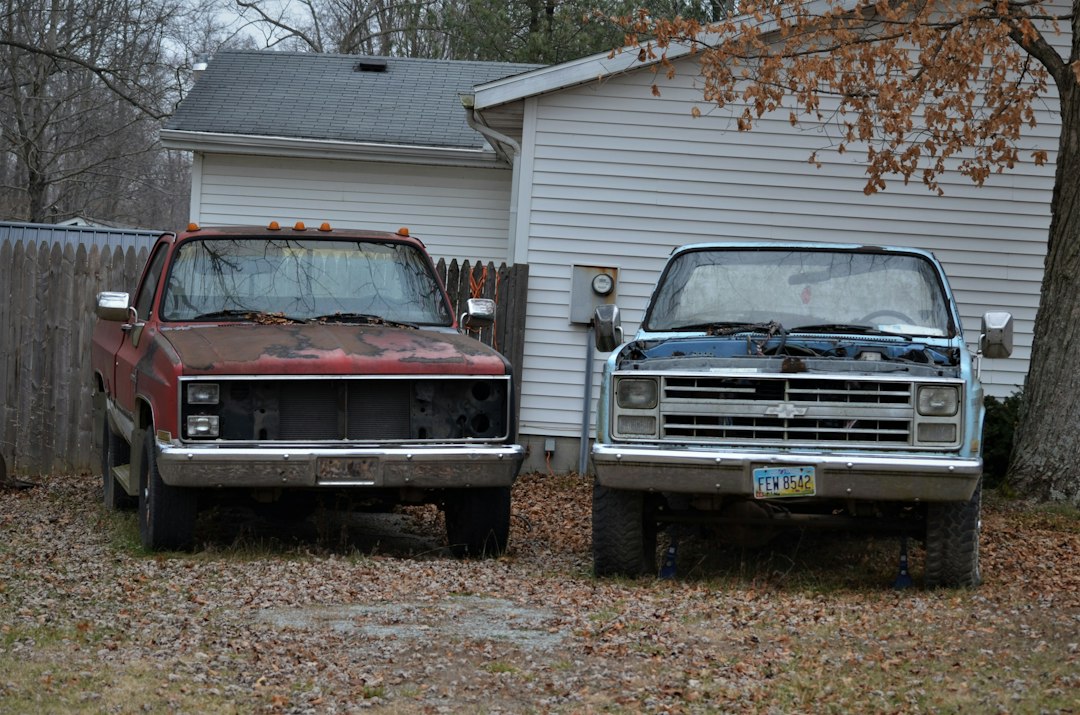
How to Restore Oxidized Truck Paint Without a Full Respray
If your truck’s paint looks chalky, flat, and lifeless, you are not alone, and you almost certainly do not need a $2,500 to $10,000 respray to fix it. Oxidation occurs when UV light and oxygen break down paint binders, leaving a chalky, matte surface that hides original colour and reduces gloss. The good news is that in most cases, that original colour is still sitting right there underneath, hidden beneath a thin layer of degraded clear coat. With the right approach, you can bring it back.
I’ve seen this play out on trucks of all ages here on Colorado’s Front Range. The combination of intense high-altitude UV radiation and winter road chemicals makes oxidation happen faster here than almost anywhere else in the country. UV intensity increases by roughly 4% for every 1,000 feet of elevation gain, meaning Denver residents are exposed to approximately 20 to 25% more UV radiation on an average day than someone at sea level. Understand the process, match your approach to the level of damage, and you can restore your truck’s paint for a fraction of the cost of a respray.
Key Takeaways
-
Oxidation is a surface problem, not a lost-paint problem. The chalky appearance is dead clear coat caused mostly by UV and neglect, the colour usually still lives underneath and is not lost. This means polishing can often bring it back.
-
Colorado accelerates the damage significantly. In Colorado’s high-altitude environment, with its increased UV exposure, oxidation can progress faster than in other regions. Pair that with winter mag chloride and you need to act earlier than truck owners in milder climates.
-
The severity of oxidation determines the method. Light fade needs only a one-step polish, moderate fade needs compound first, and clear-coat failure, flaking, exposed colour, can only be fixed by repainting. Choosing the wrong method wastes time and can cause more damage.
-
Paint correction costs far less than a respray. A DIY approach to light oxidation costs under $150 in materials, while professional paint correction pricing guides show single-stage professional correction typically runs $500 to $800, versus a full-vehicle respray starting at $2,500 to $5,000 or more.
-
Protection immediately after correction is non-negotiable. Protecting the corrected surface immediately afterward is not optional, a vehicle that has just been corrected back from oxidation has a surface that is more vulnerable than ever to further UV damage.
Quick-Start Prioritisation Framework
Use this table to match your truck’s condition to the right course of action before touching anything.
| Oxidation Level | What You See and Feel | Best Approach | Estimated DIY Time |
|---|---|---|---|
| Light | Dull sheen, mild haze, minor loss of gloss | One-step polish + sealant or wax | 2 to 4 hours |
| Moderate | Chalky feel, flat colour, noticeably faded panels | Compounding then finishing polish + ceramic sealant | Half day to full day |
| Heavy (intact clear coat) | White or grey chalk, rough surface, dead look | Heavy compound or wet sand, then polish and seal | Full day or more |
| Clear coat failure | Flaking, lifting edges, bare colour showing | Professional repaint, correction will make it worse | Not a DIY job |
Start here if you are:
-
A first-time DIYer with a lightly faded truck: Begin with a quality one-step polish applied by hand or with a dual-action (DA) polisher. Test a small section first.
-
Dealing with moderate to heavy oxidation: Use a rubbing compound before your finishing polish. Work in small sections and do not rush.
-
Unsure of your clear coat’s condition: Do the wet test first. Pour water over the affected area, if the gloss returns while wet, it is oxidation. If it still looks white or flaky, the clear coat has failed.
Why Colorado Trucks Oxidise Faster Than Most
High Altitude, High UV Intensity
If you drive in Colorado, your truck’s paint is working harder than you probably realise. In Colorado, vehicles face a constant battle against extreme weather conditions. The state’s unique combination of high altitude, powerful UV rays, low humidity, hailstorms, snow, and freeze-thaw cycles puts immense stress on your vehicle’s exterior.
Jacob Varghese of Zion Foodtrucks who builds and finishes custom trucks and trailers at 7,000 feet in Colorado where UV exposure is especially aggressive, explains that UV radiation causes chemical bonds in automotive finishes to break down, showing up as clear coat oxidation, loss of gloss, fading, and eventually peeling. He notes that a good finish lasts five to seven years in lower-UV conditions, but in Colorado, parked outside, four to five years is more realistic.
Pro Tip: Horizontal surfaces suffer first. The hood, roof, and trunk receive the most direct UV exposure and show chalky oxidation first. Inspect these panels every spring, before the long sunny season amplifies any existing damage.
Winter Road Chemicals Make It Worse
UV is only half the problem. Colorado roads are treated heavily with magnesium chloride during winter, and that chemical compounds the damage. Prolonged contact with magnesium chloride can leave painted surfaces dull, and in the case of rock chips or scratches on the surface, the introduction and prolonged exposure to mag chloride may result in paint peeling or bubbling, exposing the metal beneath to further corrosion.
When salt mixes with melting snow and moisture, it creates a chemical solution that aggressively attacks exposed metal and clear coat surfaces, causing the clear coat to lose gloss and clarity, develop micro-pitting, allow corrosion to begin in chips or scratches, and experience accelerated paint failure around edges and seams. This is why a thorough wash after every significant snowstorm is one of the best protective habits a Colorado truck owner can develop.
How to Diagnose Your Oxidation Before You Start
The Three Tests Every Truck Owner Should Know
Misreading the severity of oxidation is the most common mistake I see. Apply the wrong correction to the wrong problem and you either waste product or, worse, remove more clear coat than you needed to.
The simplest check is the wet test mentioned above. A second reliable method is the microfiber wipe test. Rub a clean microfiber across the panel, if it comes away with a chalky white or grey residue, the surface is dead but often still salvageable. A third test checks for true clear coat failure. Gently run your fingernail across the edge of a damaged spot, if it snags on a hard, raised edge, that is a tell-tale sign the clear coat is peeling.
When the Damage Is Too Far Gone
Knowing when to stop is just as important as knowing how to begin. If it is a dull, chalky haze that never actually flakes, that is oxidation, and machine polishing fixes it. If the clear coat is lifting at the edges or coming off in flakes and you can see bare colour coat underneath, the clear has separated from the base coat, and no amount of polishing puts it back.
According to the Euroluxe Detailing oxidation restoration guide, factory clear coat on most modern vehicles runs between 50 and 120 microns depending on the manufacturer, and safe polishing generally removes two to five microns per correction cycle. A professional can use a paint thickness gauge to confirm whether enough material remains, worth asking about before paying for an extensive correction on a very aged or heavily weathered truck.

The Step-by-Step Restoration Process
Stage 1, Thorough Wash and Decontamination
Every successful restoration begins with a clean surface. Surface preparation removes oxidised clear coat, environmental contaminants, and old wax so you can safely polish, decontaminate, wash, and dry panels thoroughly before abrasive polishing to avoid embedding particles and causing swirl marks.
After washing, use a clay bar to lift bonded debris. Glide the medium-duty clay bar across lubricated paint once the surface is clean and cool to the touch. You will feel the surface transform from rough to smooth. Do not skip this step, any embedded grit left on the surface will create new damage under your polishing pad.
Stage 2, Compounding for Moderate to Heavy Oxidation
Compound polishes are designed specifically to remove oxidation by polishing off an extremely thin layer of the paint’s topcoat. For moderate oxidation, a medium-cut compound on a foam cutting pad is your starting point. For heavier damage, a more aggressive compound may be needed, but always test a small section first.
Attach your chosen polishing pad to the dual-action polisher and apply three to four dots of compound. Work in 2×2-foot sections using overlapping passes in a side-to-side, then up-and-down motion. Work in the shade whenever possible, product that dries on the panel before you wipe it off leaves residue and reduces cut.
Pro Tip: The rule for severe oxidation is simple, start with the least aggressive method that works. If a heavy compound and the right pad improve the finish, stay there. Only move to sanding when compounding clearly is not enough.
Stage 3, Finishing Polish
Once you have compounded the panel, the surface will look shinier but may still carry some micro-haze from the compounding stage. After compounding, switch to a polishing compound. This helps remove haze and brings back more gloss. A DA polisher with a softer foam finishing pad works well here, or you can finish by hand using a clean microfiber applicator.
Stage 4, Wet Sanding (Heavy Oxidation Only)
For heavy oxidation that does not respond well to compound alone, wet sanding can remove that stubborn, chalky layer before you polish. Knowing how to wet sand gives you the ability to fix deep scratches, orange peel texture, and heavy oxidation that polishing alone cannot touch. Before you start, decontaminate your car paint, any embedded grit left on the surface will cause new damage under the sandpaper.
Soak the sandpaper in water for several minutes to ensure proper lubrication during sanding. Begin with the least aggressive grit, for example, 2000, and progress to finer grits as needed. After sanding, move straight to compounding to remove the sanding marks, then follow with a finishing polish to restore full clarity. Wet sanding on a truck is a slow, careful process, work one panel at a time and check your progress frequently.
Stage 5, Protect the Result
This is the step most truck owners skip, and it is the one that matters most for lasting results. Freshly polished clear coat is highly vulnerable to UV rays and must be sealed immediately with a ceramic coating or high-quality sealant.
Ceramic coating offers durability that traditional wax cannot match, lasting for years instead of weeks. Its tough, protective layer shields your vehicle from UV rays, chemical stains, and light scratches, keeping your paintwork vibrant and intact. For Colorado trucks facing intense sun and mag chloride winters, ceramic coating after restoration is a genuinely worthwhile investment. Carnauba wax will work as a more accessible option, but carnauba wax typically lasts only one to three months, so you will need to reapply consistently throughout the year.
Pro Tip: If you are going the ceramic route, remember that proper ceramic coating application requires a fully decontaminated and corrected surface, a clean environment, and adequate cure time, typically 24 to 48 hours before water exposure. If you are not confident applying it yourself, having it professionally installed protects your correction work properly.

The following demonstration walks through the practical application of a compound on heavily oxidised paintwork, which may help clarify the buffing and product-use stages described below.
DIY vs. Professional Paint Correction, What Makes Sense for Your Truck
The True Cost of Each Option
I always encourage truck owners to weigh the numbers honestly before deciding. A fully equipped DIY setup costs approximately $200 to $350 for the first vehicle. Professional single-stage correction typically starts at $150 to $300 per vehicle. For heavier two-stage or three-stage work, paint correction cost guides for 2025 show professional pricing ranging from $500 to $800 for a single stage, $1,000 to $1,500 for a two-stage, and $1,800 to $2,500 or more for a full three-stage correction.
Compare that to a full respray. According to 2026 car paint repair cost data from Ecostify, a full vehicle respray with premium paint runs from $5,000 to $10,000 or more. Even a basic single-stage respray starts around $2,500. Paint correction and a ceramic coating for a moderately oxidised truck will cost a fraction of that and, if done well, produce results that last several years.
When to Call in a Professional
Some situations are genuinely better handled by an experienced detailer. If your truck has very heavy or uneven oxidation across multiple panels, inconsistent clear coat thickness, or any signs of actual peeling, a professional brings the right tools, including a paint thickness gauge, to work safely and achieve a better result than most DIYers can manage alone. Paint condition is one of the first things a prospective buyer evaluates. Edmunds’ vehicle condition ratings directly factor paint gloss and the presence of scratches into pricing tiers, meaning visibly swirled, oxidised, or hazy paint signals neglect and invites negotiation downward. Corrected paint supports a stronger asking price, and the investment in correction before a sale frequently returns more than the cost of the correction in the final transaction.
If you are in the Denver area and want the job done right without the risk of a DIY result that needs redoing, FB Mobile Auto Detailing offers mobile paint correction and ceramic coating services, meaning they come to your truck wherever it is parked, saving you the trip and the hassle.
Common Mistakes That Ruin an Otherwise Good Restoration
Working in Direct Sun or on a Hot Panel
Heat dries your compound before it can do its job and bakes residue into the paint. Always work in shade, in a garage, or on an overcast day. If the panel is too warm to rest your hand on comfortably, wait.
Using Too Aggressive a Product Too Soon
Starting with a heavy-cut compound on lightly oxidised paint removes unnecessary clear coat and can introduce deeper scratches that then need further correction. Start conservative with the least aggressive compound first, use a test panel approach to complete one section and verify your method before continuing.
Skipping the Sealant Step
What correction cannot do is add clear coat back. Every polishing cycle removes material. If a panel starts thin, correction makes it thinner. Polishing without sealing means all that freshly exposed, thinner clear coat is now bare and unprotected against the same UV radiation that caused the problem in the first place. In Colorado, that means your restoration can begin to undo itself within a matter of months.
Frequently Asked Questions
How do I know whether my truck’s paint can be saved without a respray?
If it is a dull, chalky haze that never actually flakes, that is oxidation, and machine polishing fixes it. The wet test is the quickest way to check, pour water over the panel and see if the gloss temporarily returns. If it does, the colour layer is still intact underneath and you have a good chance of restoring it without repainting. If the surface still looks white, cloudy, or flaky when wet, the clear coat has failed and a respray is likely needed.
How long will a DIY oxidation restoration last?
It depends entirely on what you apply after correction. Carnauba wax reapplied every two to three months will maintain the result reasonably well, but for Colorado conditions, ceramic coating is the more durable option, lasting anywhere from two to five years or more thanks to its tough bond with your vehicle’s paint. Combine a quality sealant with regular washes, especially after snowstorms, and a well-restored truck paint can hold up for several years before needing retreatment.
Can I restore oxidized paint by hand, or do I need a machine polisher?
Polishing by hand gives you the most control over how much finish you remove, but you sacrifice some raw polishing power. If the oxidation of your truck is not too severe, you might be able to get away with hand polishing. For moderate or heavy oxidation, a DA polisher will produce significantly better, more even results and save you several hours of physical effort. If you do not own one, many auto parts stores hire them out.
Is it worth restoring oxidized paint before selling a truck?
Edmunds’ vehicle condition ratings directly factor paint gloss and the presence of scratches into pricing tiers, meaning visibly swirled, oxidised, or hazy paint signals neglect and invites negotiation downward. Corrected paint supports a stronger asking price, and the investment in correction before a sale frequently returns more than the cost of the correction in the final transaction. A clean, polished finish also photographs better, which matters enormously for private sales.
How often should I wax or seal my truck after restoring the paint?
Consistent waxing every few months prevents oxidation from returning. In Colorado, where UV intensity is elevated year-round and roads are salted heavily in winter, I would lean towards the shorter end of that range, roughly every two months during summer. If you invest in a ceramic coating after your restoration, you reduce that maintenance burden significantly and gain much stronger protection against the specific conditions Colorado dishes out.
Sources
-
Car Paint Oxidation: What It Is, Causes and How to Fix It, Fresh Layer Detailing. Causes and professional correction methods. https://www.fresh-layer.com/blog/car-paint-oxidation-causes-prevention-and-restoration
-
Can Faded Car Paint Be Restored Without Repainting, Dallas Auto Paint. Polishing vs. respray comparison. Professional paint correction versus respray comparison
-
Restore Faded Car Paint Without Repainting: DIY + Pro Fix, Golden Bay Detailing. Oxidation diagnosis and correction guide. https://goldenbaydetailing.com/blog/restore-faded-car-paint
-
Restoring Oxidized Paint: What Correction Can and Cannot Do, Euroluxe Detailing. Clear coat thickness and correction limits. https://euroluxedetailing.com/blog/paint-correction-oxidized-paint-restoration
-
How to Fix Oxidized Car Paint: A DIY Guide, Derek’s Detail. DIY methods by oxidation level. https://dereksdetail.com/blog/how-to-fix-oxidized-car-paint
-
How to Fix Oxidized Paint and Restore Your Car’s Shine, Better Boat. Step-by-step oxidation removal. https://betterboat.com/blogs/news/how-to-fix-oxidized-paint
-
How to Remove Oxidation from Car Paint, Chemical Guys. Compound and clay bar techniques. https://www.chemicalguys.com/blogs/exterior-how-tos/how-to-remove-oxidation-from-car-paint
-
Clear Coat Peeling: What’s Fixable and What Isn’t, Detailers of Las Vegas. Oxidation vs. true peeling. https://www.detailersoflasvegas.com/blog/clear-coat-peeling-can-it-be-fixed
-
I Asked RV Experts What Sun Damage Is Doing to My Truck, Yahoo Lifestyle. Colorado UV and paint degradation. https://creators.yahoo.com/lifestyle/story/i-asked-rv-experts-what-sun-damage-is-doing-to-my-truck—and-now-im-anxious-025813604.html
-
12 Car Paint Damage Types That Destroy Resale Value, Springs Detailing. Colorado high-altitude oxidation risks. https://springsdetailing.com/car-paint-damage-types/
-
How Colorado’s Climate and Weather Impact Auto Paint, Yoder Collision Network. Freeze-thaw and UV paint damage. https://yodercollisionnetwork.com/auto-body-repair/how-colorados-climate-and-weather-impact-auto-paint-signs-and-repairs/
-
Why Colorado UV Destroys Headlights Faster Than Other States, Headlight Boost. UV intensity at altitude. https://headlightboost.com/blog/why-colorado-uv-destroys-headlights-faster/
-
Is Your Car at Risk? The Hidden Dangers of Winter Road Salts, AutoWash Co. Magnesium chloride and paint damage. https://www.autowashco.com/post/is-mag-chloride-destroying-your-car
-
How Winter Road Salt Affects Paint Protection Film in Fort Collins, KCL Creations. Salt damage to clear coat. https://kclcreations.com/how-winter-road-salt-affects-paint-protection-film-in-fort-collins/
-
Paint Correction Cost: What to Expect and Is It Worth It?, Chemical Guys. Cost comparison: correction vs. respray. https://www.chemicalguys.com/blogs/exterior-how-tos/paint-correction-cost
-
How Much Does Paint Correction Cost in 2025?, Experience Detailing. Full price guide by stage. https://www.experiencedetailing.com/how-much-does-paint-correction-cost/
-
Car Paint Repair Cost 2026, Ecostify. Full respray pricing data. https://www.ecostify.com/blog/car-paint-repair-cost
-
Ceramic Coating vs. Wax: How Both Protect, Chemical Guys. Protection longevity comparison. https://www.chemicalguys.com/blogs/exterior-how-tos/ceramic-coating-vs-wax
-
How to Wet Sand a Car (Step-by-Step Guide), Car Care Total. Wet sanding technique and safety. https://carcaretotal.com/how-to-wet-sand-a-car/
-
How to Remove Oxidized Clear Coat, GarageGuide.blog. Diagnosis and wet test method. Pour water over the affected area


